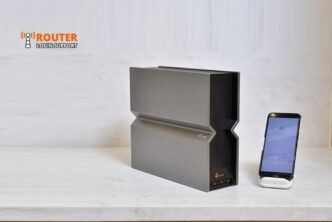
TP-Link, a leading brand in providing WAN devices, has consistently pushed the boundaries of technology. Their routers are designed to bring cutting-edge technology and flawless streaming experiences to your home. With a strong foothold in the global market, TP-Link continues to dominate with its commitment to perfection. This blog will guide you through the steps to change the tp link router password using the tplinkwifi.net setup page.
Why change the Wi-Fi password?
The TP-Link routers are renowned for their high-speed internet-sharing capabilities. Built with the latest technologies, such as the 802.11ac wireless standard, dual-band antennas with extended range, and Gigabit connection speeds, this router stands out as one of TP-Link’s best offerings for home networks.
While changing the Wi-Fi password may seem like a simple task, many users have questions about the process. It’s crucial to change the password periodically to maintain network security and prevent unauthorised access to your Wi-Fi network. In the following steps, we will explain how to change the tp link router password and ways you can handle the tp link router password forgot like situations easily.
Changing the TP-Link Router Password
To change the Wi-Fi password on your TP-Link router, follow these steps:
- Find the tp link router login address. Since you will need to ensure you’re connected to the network either through a wired or wireless connection, finding the same becomes important. Open the command prompt and type “ipconfig” to locate the default gateway IP address. Take note of this IP address. You can also use the web address tplinkwifi.net instead of the IP address.
- Using a laptop or PC connected to the network, open a web browser, and enter the default gateway web address in the address bar. This will take you to the tp link router login page.
- Type in the username and password for your TP-Link router. If you haven’t changed them, the default values are typically “admin” for both.
- Once logged in, navigate to the Wireless settings. You can change the SSID (network name) and password for either the 2.4GHz or 5GHz frequency bands. Access the Wireless 2.4GHz tab, update the SSID, and change the password under the wireless security settings. Repeat the process for the 5GHz band if desired.
- After you have made the necessary changes, click on the “Save” button to save the new settings. The router will automatically reboot to apply the changes. Once the router restarts, you can log in using the new SSID and password.
Changing the Password using the Tether App
In order to change the password of your TP-Link router using an app, you will need to have the app downloaded and installed on your smartphone. Once you have it, you can proceed with the steps as described below:
- Launch the Tether app on your smartphone.
- Tap on the Local Device name you see on the screen.
- Tap on the Tools button on the bottom right to start managing your TP-Link router credentials.
- Find the System setting on the page. This is likely to be the last option on the page.
- Tap on the same and then click on the Login Account button you see on the screen.
- The app will now ask you to enter the current password of your router. Tap into the field below the “Enter your Current Password” prompt and click on Ok.
- Once the password details are verified, you can type in the new password details and tap on the Save button on the top right.
- That’s it! You have now changed the TP-Link router password successfully.
Unable to change the TP-Link router password
If you are unable to change the TP-Link router password details, you can always follow the general troubleshooting steps to resolve the issue. Here are some steps you can follow:
- Check if you are using the correct existing password credentials. Make sure you type the correct sequence, case and order of these characters in the password field.
- Restart the router once and try entering the password details in the designated field again.
- If the issue persists, try resetting the tp-link router to factory settings. This will reset all the settings including the network and device’s. Once reset, you can reconfigure the device’s settings including the WiFi and admin password.
The final word
The tp-link router password change process is straightforward and helps maintain network security. By following the step-by-step guide outlined in this article, you can ensure that your TP-Link router is protected from unauthorised access. Remember to periodically change your Wi-Fi password for enhanced security.
If you have any questions regarding the tplink router login or password issues, feel free to reach out to our team anytime.


Trying to get my phone on my wifi with my netgear50 but it wants a password that i have no clue what it is or if i even completed acct info when i got it a few yrs ago. What do i do? Im very low tech.